Thursday, April 19, 2012

Homemade Laundry Detergent! $ Saver!

Being the stereotypical "poor college student" I have been looking for ways to cut down on routine costs. That's when I happened to stumble across a pin on Pinterest about making your own laundry soap. I got this recipe from 'Why Not Sew's' blog. The recipe seemed pretty simple and straight forward.

First you're going to need a few things:
(This recipe will make 2 gallons of detergent, so halve it if you want less.)


  • 1 Bar of soap (pick a scent you like)
  • 1 cup Borax (found in the detergent aisle)
  • 1 cup of Arm & Hammer Washing Soda (I found mine at the local Dillon's store in the laundry aisle.)
  • large pot
  • Grater
  • Funnel (really helps with pouring)
  • Spoon
  • 2 empty gallon containers (I used 2 milk containers.)


After you have your items gathered:

  • Grate your bar of soap into the pot.
  • Fill one of your gallon containers with water and pour into the pot.
  • Turn on heat and cook until the soap is dissolved. (It really helps if you grate your soap into really tiny flakes)
  • Add the Borax and Washing Soda and stir.
  • Bring to a boil. The mixture should start to coagulate.
  • Turn off the heat and add 1 gallon of cold water. Stir well and let cool.
  • Pour your mixture into their containers.


I use about 1/2 cup per load. The mixture doesn't make many suds if any at all but your clothes are most definitely going to be clean!
You should have plenty of borax and washing soda to make many more gallons! After the initial cost of buying the ingredients you won't have to worry about spending $8 on 32 loads when you can spend the same amount for TONS more!

*I made 2 gallons over 6 months ago and have finally just ran out of my original batch!

Tuesday, April 10, 2012

Love Thrifting!

 Thrifting has never really been my thing. Every time I go I seem to always be the youngest person in there. However I decided to not let that stop me when I heard that one of our local thrift stores was having a $2 bag sale. That meant anything I could shove into an old walmart sack was mine for $2. Something I just couldn't pass up. So I grabbed my change jar and headed downtown.

One of my first pins on Pinterest  happened to be a skirt made from a men's button down shirt. Today seemed to be a great day to stock up. I grabbed a really great slouchy sweater for winter, along with a few skinny belts and 3 men's shirts. I also happened to stumble upon a really great clutch purse. 
It's a little plain for my taste but I am excited to maybe add something extra on to make it mine! Not bad for about $2.17 worth. 

I'm planning on making the skirt tomorrow. Hopefully I can get another post up with a link to the tutorial I plan on using. 

Thrifting may not be so bad after all!

Monday, April 9, 2012

Sweet Dreams are Made of This.

 I have been looking for new ways to decorate my house that doesn't involve anything permanent. (I live in a rental). After perusing pinterest for a while I found this!
Pinned Image

I then decided that this is what I would do today. Instead of you know...cleaning.

First you're going to need a few things.


  • Printer/Stencil
  • Exacto knife
  • mod podge
  • Old magazines
  • Glue stick/tape (optional)


I had a few BH&G and a few artsy music magazines laying around. I first printed out the words that I wanted to use and laid each letter out on top of the page I decided to use.  I glued down the outer corners of the PAGE (NOT the letters) so that the paper would not slide around.  

Next I cut out each letter with my exacto knife.

After you're going to want to plan out the order and spacing. Then take some mod-podge (Here's a homemade recipe) and stick them up on the wall.


I haven't had them long so I'm not sure of the staying power but it will not ruin the wall itself. My mod-podge is basically Elmer's school glue and water.

I think I might paste some neat designs in the living room as well!

Saturday, November 19, 2011

So Hot Jalapeno Poppers

I recently found this recipe for Crescent rolls jalapeƱo poppers on Pinterest and decided that this would be a perfect little snack to make in between classes or studying for an exam. 
It's super easy and really delicious!
  • All you need is a can of Crescent roll dough, cream cheese, a few jalapeƱos, and if you're feeling extra fancy some bacon. 
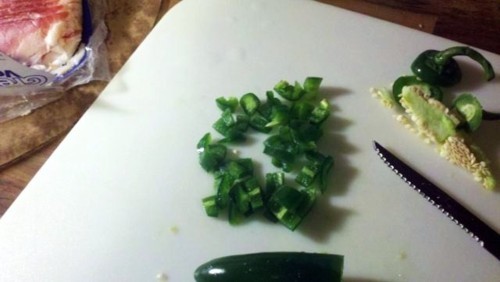
  • You first want to cut the jalepenos in half and clean out the seeds. Then dice them into smaller pieces.
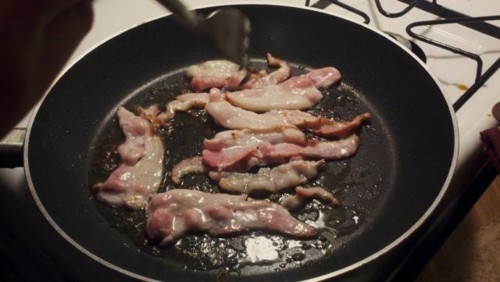
  • Lindsay from Aisle to Aloha suggests cutting the bacon before cooking it, however it doesn't really matter as long as the bacon is cooked!
  • Now you're going to open the crescent rolls (I flinch EVERY time.) and roll them out flat onto a baking sheet. *To make smaller bites cut each triangle in half.
  • Now all you need to do is put a little bit of cream cheese, bacon, and jalapeno on the crescent roll, and pinch together the sides and top so all that deliciousness doesn't escape.
  • You're going to bake them for about 10-15 minutes at 350. 
Time to chow down! These are so good! You can bring them to small parties, tailgates, or just keep them all to yourself!
Let me know how yours turned out!

Friday, November 18, 2011

Sock It To Me.

Today has been one of those days where I just want to throw something on and pull my hair up and out of the way. However, I know later I will regret the fact that my hair will have a hardcore ponytail kink especially if I choose to leave the house.

So I found this AWESOME hair tutorial about making sock bun curls atASpottedPony. At first I was weirded out by the idea of putting a sock in my hair but once I saw how easy and amazing the curls are I decided I needed to do this.

This method requires no heat which is great since I hate how damaging it is to curl my hair all the time. (My hair is naturally really straight so it takes a lot.) Plus, the bun looks good enough to wear around the house or go to a morning class without looking like a complete freak.

You want to start with hair that is mostly dry so your hair will not be wet once you decide to take down the bun.

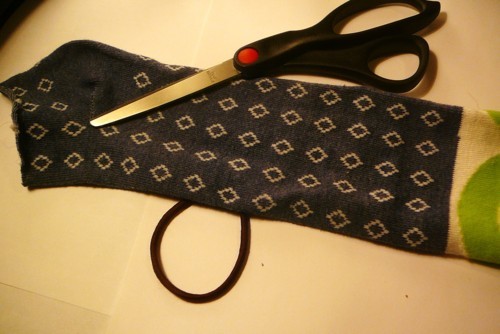
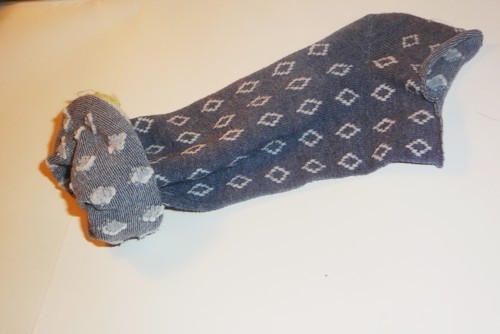
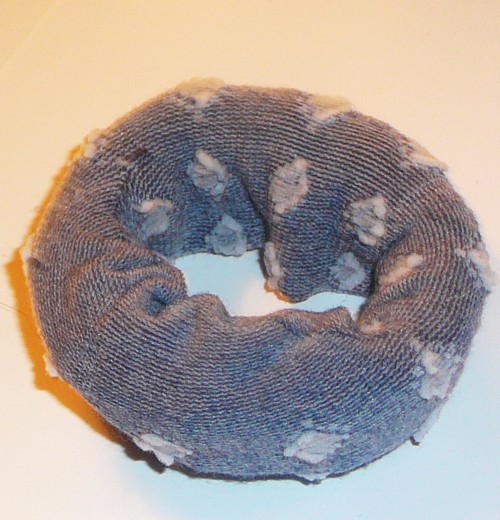
Then take a long sock (I found some old knee high Christmas socks) and cut the toe off. You're going to want to roll the sock as if you're trying to put pantyhose on. The result is basically a sock doughnut!


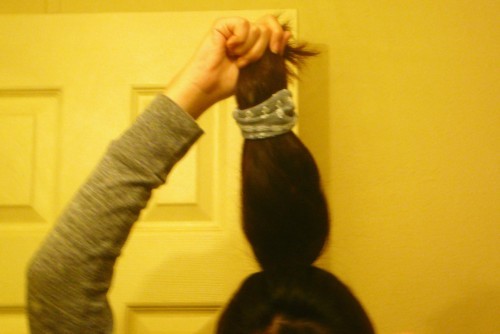
Next, put your hair into a high pony tail and pull the ponytail through the hole in your sock 'doughnut'. Pull it out just so you have a little bit of hair poking through the middle. These are the pieces you are going to tuck into the underside of the bun.

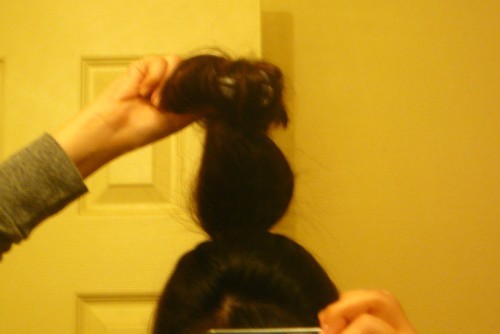
(Excuse my blurry photos)

After you have tucked that part in, roll the sock down the length of your ponytail while tucking your hair in. You should end up with a bun! Now go do whatever you need to get done (watch Glee) or you can even sleep on it.
When you pull the bun out you should have a set of beautiful curls that took basically no effort!
Now for my cheesy mirror picture! :)

My hair is really thick so my curls were big. I might try using some product or maybe a thinner sock next time to get tighter curls.

If you have trouble visualizing some of these steps or from my photos I found videos by A Spotted Pony that do a GREAT job of showing the steps in a clear way.

I would love to see your results! Just leave a photo comment!